
Objective
Article aimed at quick glance for all the basic commands for Git Repository!
**Recommended to use the Git Bash tool to perform all the git actions. Tool can be downloaded from git-scm
Git Config
To setup the git environment in the local for the first time helps faster access to the distributed repository(s) at a system level.
1. Configuring the user name
User has to provide the first name and last name that will be attached to every commits made in the repo. It is not necessary that the user name has to be same with GitHub username or any other repo’s username.
1
git config --global user.name <username>
2. Configuring the user identity
Allows user to specify the user email. Both user name and user email address are identifying the repositories available in the system and not associated globally or with any distributed repos.
1
git config --global user.email <userid@domain.com>
3. Configuring the editor
To set the default editor by the git needs to be configured in the .git. This will allow git to open the editor configured for any further input required. Many editors are available like VS Code, Atom, Vim, Nano, emacs, Sublime. Here the sample is provided for VS Code.
1
git config --global core.editor "code --wait"
4. To open the config file
At any point if the configuration needs to be modified, then the following command will be useful to open the config file in the editor configured.
1
git config --global -e
5. Configuring the carriage return / new line
To avoid changing the status of all the files as modified because of automatic EOL conversion done.
Windows
1
git config --global core.autocrlf true
OS X
1
git config --global core.autocrlf input
6. Configuring the color mode
To set the default command line coloring for easy differenciation
1
git config --global color.ui auto
Without the --global flag, all the git configs will be applied to the specific repository only.
Git Online Repo
To start with the existing code base from the online repository say GitHub, the repo needs to be pulled to the local base. Following commands will help start the process.
1. Git Repo URL
To fetch or to connect to the repo available online, first the repository needs to be cloned to the local system. Steps to be followed as below:
Login to GitHub and goto the repository
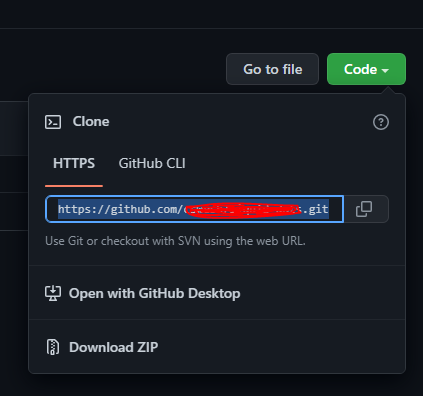 \
\
2. Git Clone
Using the url obtained as mentioned in previous step, clone the repo using the following cmd.
1
git clone https://<giturl>
3. Git File List
To see the list of files in the directory cloned and to confirm / verify the number the files using the cmd.
1
ls
4. Git Pull
On demand if the online repository is been updated by the fellow team and in order to fetch the recent changes in the online directory and merge the changes to the local use this cmd.
1
git pull
git pullis a combination of
git fetch- which only fetches the changes and stores in the refs/remotes/in .git folder.
git merge- updates the changes in the local repository
5. Git View
To view the content inside the file
1
cat <test.txt>
Git Flow
Now we will see how the code flow happens using the git commands. Starting from the scratch how the life cycle begins and how it continues to the online repos.
1. Git Initialize
Once you created a folder for a new application, the folder needs to be initialized as a git repository. Following cmd will initialize the folder as local git repo.
1
git init
Once initialized, a .git folder will be created. In this folder all the changes made to the code files are tracked with version history and the commit history. Also when this folder is synced online repo, all the information related to the repo name, url, branch name, number of branches, last modified version are all captured.
2. Git File Addition
Now the file(s) is created in the git initialized folder as part of the code function, say creating a simple web page with index.html and corresponding styles added to page in the style.css file. These files are tracked by the git but not added by default. To add the file to the staging area use the following cmd.
Add single file
1
git add index.html
Add multiple files using
1
git add .
or
1
git add -all
3. Git File Status Check
Before committing the changes, the file will added to the staging area. To show the modified files use
1
git status
4. Git File Stage Differences
But in time when the number of files increases it will be pretty difficult to track which file is added to staging and which are not. To check the status of the files in the folder will allow us to see the differentiation in not stagged files use
1
git diff
To show all the stagged files but not committed use
1
git diff --staged
5. Git File Commits
Once the changes are ready to be uploaded to make it a version, the file or file set can be committed with the commit description by identifying with the flag -m for message. The cmd used as follows.
1
git commit -m "<commit description on the change done>"
6. Git Remote
To view the list of remote repos available / configured with url, use the following cmd
1
git remote -v
To add a new remote location, add a name for the remote location which will used in future references and map the url
1
git remote add <name> <URL>
To rename and remove the remote location added, use the following cmd
1
2
git remote rename <oldName> <newName>
git remote remove <name>
7. Git Publish
To publish the committed version of the files to online repository, use the following cmd. While pushing the files from local to remote online provide the remote name and remote branch. Also if upstream (tracking) reference to be added, include the flag -u in the cmd as follows.
1
2
git push <origin> <main>
git push -u <origin> <main>
To delete a branch in the online repository use
1
git push <name> --delete <branchName>
Additionally
Apart from the flow, few additional commands that are useful
1. Branching
To list all the branches available use
1
git branch
* denotes the branch which is connected presently
To create a new branch
1
git branch <branchName>
To rename the branch
1
git branch -m <oldName> <newName>
To delete a branch in the local repository use the flag -d and to delete forcefully use -D
1
git branch -d <branchName>
In order to change the connected branch to a new branch use
1
git checkout <newBranchName>
To create a new branch and switch the newly created branch use
1
git checkout -b <branchName>
To show the commit history in current branch
1
git log
To show the difference available in branchOld and not in branchNew
1
git diff branchNew...branchOld
2. Misc.
To delete the file from the folder and stage the removal changes use
1
git rm <filename>
To move the existing file path to a new path and stage the changes use
1
git mv <existingPath> <newPath>
To apply the commits of the current branch ahead of any others use
1
git rebase <commit>
To clear the stagging area and start working from the tree of the specified commit id use
1
git reset --hard <commit>
If you are juggling between branches and wanted to save all the modified files temporarily in the stagged area use
1
git stash
To discard all the temporary changes stagged use
1
git stash drop
To move a commit from one branch to another
1
git cherry-pick <commit>
Comments powered by Disqus.